Occasionally a problem occurs that the lovely staff at ZoHa Islands cannot help with…. so this nifty new Linden Labs Quick Tips video is an informative look at navigating the Support Portal and filing Abuse Reports.
Second Life is fun — but sometimes you might encounter a problem inworld.
Have a billing question? We want to help you make the most of your Second Life. This week’s QuickTips video tutorial walks you through the many support options available to both basic and premium Second Life users.
Don’t be a victim, be informed! (re-post from April 2, 2012)
Phishing scams in Second Life.
There has been an increase in Phishing attempts in the last couple weeks and a lot of people have fallen for them and lost their Second Life Accounts.
Phishing in SL is mainly the act of tricking a user into giving their login and password information through fake yet convincing Second Life login webpages.
Here is how it works.
– Someone posts a link and sometimes text to entice you to click it, sometimes this can be a friend or someone you know (because they’ve already had their accounts hacked).
– You click the link and it takes you to what looks like a Second Life Login screen.
– You log in using your SL Username and PW.
– You’ve just been Phished and given someone your SL Login information. They can now log into your SL account, take your money, destroy your SL Property, delete your inventory.. etc etc etc.
How to avoid being Phished
If you have clicked a link, and it takes you to a login page of some kind, no matter how much it looks real… DO NOT LOG INTO IT YET!
FIRST, look at the URL very carefully. The real Linden Lab Login URL starts with https://id.secondlife.com/….
If it does NOT start with https://id.secondlife.com/, then it is not a real Second Life login web page. Do not log into it, and DO file an abuse report on the person who sent the link. From the Help menu, Report Abuse.
If you are unsure, go to http://secondlife.com and click on the “LOGIN” at the top right. That will take you to the legit login page which starts with https://id.secondlife.com/… Log into that page, then follow the link. If the link still takes you to a log in widget.. it’s totally a scam.
If you’ve already been Phished
Immediately
– Go to http://secondlife.com
– Click the LOGIN link at the top right and enter your login information.
– On the right is a link called “Account” click it!
– Then click “Change Password” and change your password right away.
Please, protect your accounts. Think 3 times before entering your login information. Always check the URL.
With thousands of places to visit, how do you find the one you’re looking for?
This week’s QuickTips video tutorial provides tips on using Search, Events and the Destination Guide to seek and find the cool places you want to explore.
Every week the Linden Lab Destination Guide editorial team pores through the many awesome submissions for new locations and events. They could be an alien invasion through darklit corridors, an intricately detailed fantasy setting or even a surreally romantic metallic swamp.
Check out the destionation guide by clicking on this link!
If your inventory’s anything like mine is it could use a drastic cleaning! Well here’s a nifty tutorial on how to clean out the trash and lighten your load in Second Life. A cleaner inventory loads faster and use less resources!
1) Get Your Total Item Count Shown in the video below @ 0:42
For fun (or abject horror), start typing something — anything — in the Filter Inventory field. Your item count will rise above, until it’s done loading. You can compare this to what it is when you’re all done.
Don’t be hard on yourself, though: this count includes Library items which you can hide, since they’re not actually yours.
2) Make a “Temporary” Folder for Sorting Shown in the video below @ 1:18
Right-click the My Inventory folder and select New Folder. Name this folder “Temp”, or if you want it to stand out, something loud like “~*~ TEMP ~*~”. Drag items that you’re not sure of into here, so you can sort them out. This prevents them from clogging up casual folder browsing.
You can extend this concept more specifically. For example, create a “Temp” folder in each main folder like Objects.
3) Sort the “Temp” Folder Shown in the video @ 2:21
Here’s a basic process that I’ve refined over time:
Put on some mood music to get you in the zone.
Teleport to a clean surface, like a white skybox or a public sandbox. I have a flat platform which is set to Full Bright (neutral lighting), and makes it easiest to see what I’m placing.
Drag and drop objects from your “Temp” folder inworld, so they rez and you can see what they really are. This is useful if you have a lot of generically- or identically-named stuff (like lots of objects named “Object”). “No copy” objects are removed from your inventory after being rezzed, so take them back from inworld if you want to keep them. Otherwise, you can delete the inworld instance.
Move objects you want to keep to another folder. You may have an existing sorting scheme. I have “Archive” folders for objects dated by month, because I often have memories attached to objects of how I got ’em.
Depending on the land, you should either clean up after yourself or let auto-return take care of it. In the latter case, multiple objects returned to your inventory simultaneously appear in your Lost And Found folder as coalesced objects. Like the Trash, you can easily and permanently delete its contents by right-clicking it and selecting Empty Lost And Found. Shown in the video below @ 5:14
4) Continue Onto Other Item Types
Objects are just one inventory item type; you surely have clothing, notecards, textures, and so on. For each item type, I like to go through them as a batch. These tricks make it easier:
For animations, gestures, notecards, scripts, sounds, and textures (including those in your Photo Album): hold Shift key while clicking to select a range of items, or hold Ctrl while clicking various un-adjacent items in a list, then right-click and select Open to open all those items in a single window. This makes it easier to browse each item and decide if you really want to keep it. Shown in the video @ 5:48
For clothes and other wearables, it can be a good idea to have a minimal, “neutral” avatar so you can easily see what’s added upon wearing. While an ideal one isn’t provided off the bat, I suggest making a nude/underwear outfit of your fave avatar. This also accurately reflects your bodily proportions, which matters because just like the physical world, wearables look awful at the wrong size.
If you want to save a texture to your local hard drive but no longer need it in your inventory: double-click the texture and click the Save As button, which saves it as a TGA file which can be opened or converted by an image editor like FastStone Viewer. (This only works if the texture is fully-permissive, like in-Viewer pics you take that end up in the Photo Album.)
5) Eliminate Useless Redundancy by Deleting Duplicates Shown in the video below @ 6:34
You don’t need more than a single copy of an item in your inventory if it’s copyable, so after you’ve checked goods out, select dupes and hit that Delete key. But before you do, be aware:
Items with the same name aren’t necessarily the same. For example, if you work on an object inworld and take it back into your inventory, it keeps the same name. This is confusing if you also keep older versions of it. You can click the little gear icon at the bottom and choose Sort by Most Recent. Also, learn from many great content creators: append a version/revision number to the item name. I sometimes type the date in the name as a self-reminder.
Landmarks are one of the most notorious types of dupes. Here’s why: many, many stores give a landmark in each product box. While this is initially useful to find your way back if you want to buy more, as shown in the video, the WORLD MAP dropdown shows landmarks from every folder in your inventory — and isn’t smart enough to hide dupes. If you don’t use that dropdown, this doesn’t matter to you, but otherwise, you can filter (search) your inventory for those dupes by name, then delete them.
Furthermore, I don’t keep many landmarks: since any landmark can be converted to a standard web link known as a SLurl, I save SLurls on the web instead, like in my Flickr exploration albums which have the advantage of loading quicker and giving me higher-resolution visuals.
Delete original boxes — MAYBE. There are two schools of thought: some Residents prefer to keep original boxes of copyable items because they’re a backup if things go awry, while other Resis feel secure not having them around, after expanding the contents into a folder. My recommendation? It really does depend on the specific items. Boxes for non-copyable objects can probably be tossed away because they’re just empty shells — unless you like the box design itself. Also, a growing number of merchants offer automated delivery if you lose something, so take that into consideration.
6) Cube Stuffing 101 Shown in the video below @ 8:00
If you’ve spent any amount of time with veteran Residents, you may have caught wind of “cube-stuffing” lore. Cube-stuffing is exactly what it sounds like: archiving a bunch of items in a cube and lowering your inventory item count. This works because object contents aren’t tallied up in the total. You can cube-stuff items you want to backup and preserve items you seldom use, yet don’t want to throw away.
Right-click and select Build on a parcel of land you have build permissions on. The build tools open.
Click the parcel to rez a cube.
In the build tools window, click the Content tab.
Drag inventory items you want to archive into the Contents folder pane. (Advanced usage: You can drag items directly onto the cube itself, but there’s a subtle exception: Dragging a texture onto a prim applies it to a prim’s face, unless you hold the Ctrl key while doing so.)
Once you’ve stuffed the cube, click the General tab to give it a meaningful name and date so you remember what’s inside later.
Limitations:
While there’s not a strict upper limit for how much you stuff in a cube, note that loading the item list can be extremely slow once you get into the hundreds of items. Also, there are no sub-folders: dragging nested folders breaks their hierarchy, so cube-stuffing isn’t that useful for original outfits.
Unfortunately, you can’t search the contents of an object as you can with your inventory.
Some Residents keep stuffed cubes out on land where it won’t be autoreturned, so they have backups in case of inventory loss — since the cube isn’t in your inventory, it won’t be affected. However, it will be affected by land changes, so be sure if you’re going to do this, rez the cube somewhere stable.
This information is provided so you’re aware of the possibilities. I don’t really cube-stuff anymore and have grown more forgiving of letting my inventory count (it’s at 13,362 right now) grow over the years, with the tradeoff that I’m more aggressive about deleting clutter. In first life, there was an insightful Lifehacker post on this titled “Rethink Your Stuff: What to Splurge On, What to Toss”. While we avatars don’t need beds and our shoes aren’t going to wear out, sentimental stories attached to an object still matter to many of us!
7) Remember to Empty the Trash! Shown in the video below @ 10:25
It’s garbage day! After all the above, right-click your Trash “folder” and select Empty Trash. Then check your total item count and congratulate yourself — your future self will say thank-you too, when they find something you couldn’t.
8) Explore Resident-Created Inventory Organizers
While the above has mainly focused on trimming your existing inventory, this is closely related to ongoing organization. Searching the Second Life Marketplace yields dozens of “inventory organizer” matches that are designed to overcome system limitations, and further automate the above steps.
For example, texture organizers can make it easier to browse through visual previews instead of muddling around in folders.
9) Further Learnin’
You can see general inventory management tips in our Knowledge Base
10) Inventory Cleaning Videos courtesy of Torley Linden
Millions of people have registered for Second Life — so chances are pretty good that there’s a community that shares your interest or hobby inworld. Connecting with people who share your interests is easier when you know how to efficiently explore the thousands of Groups and Destinations inside Second Life.
To learn more about how to find friends and connect to conversations that share your interests, watch the following QuickTips tutorial video:
Find even more tips on joining Groups and connecting with communities in Second Life in the KnowledgeBase.
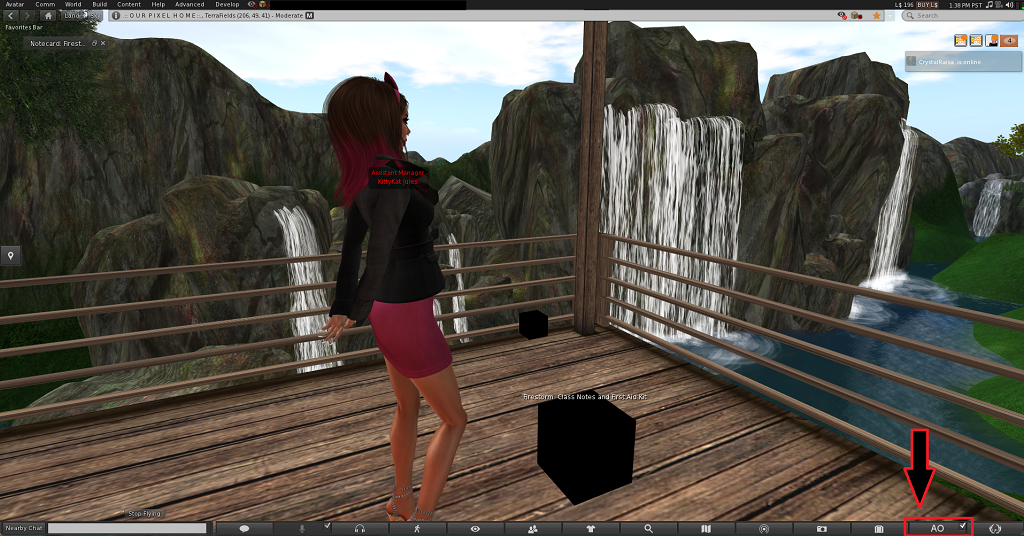
The Firestorm viewer has a built-in AO (Animation Overrider). This makes the use of scripted AOs unnecessary, which in turn reduces the amount of scripts you wear, and so server-side lag.
Without an AO, the avatar will use basic default Linden-defined animations.
The Firestorm client AO replaces the usual scripted AO by duplicating its functions, without the script overhead.
1) First a brief explanation of the terms as they are used here.
AO: Animation Override or Animation Overrider. Generally, a scripted attachment worn as a HUD, containing animations and notecards which, along with the scripts, animate the avatar while it is in certain states, such as standing, walking, flying, etc.
Animation Set: The collection of animations which, taken together, make up any given AO.
Animation Group: One or more animations which serve to replace a single animation state. Examples of animation groups include stands, sits, walks, etc. All of the animation groups, together, make up an animation set.
2) Understanding your AO Menus
The AO is activated by clicking on the right side of the button labeled AO; it will show a check mark when enabled.. To disable it simply click on the checkmark. You can also type “cao on” and “cao off” in local chat.
If you are using the Vintage skin the AO is activated by clicking on the AO button on the right side of the bottom toolbar.
Clicking the AO button opens the AO window. On the Vintage skin click the arrow on the right side of the AO button.
The mini AO window gives quick and easy access to a few basic functions, such as moving from one stand animation to another, toggling sit overrides and loading a new set of animations.
This small window has a wrench icon; clicking that opens the AO window to its largest size, allowing full control of the AO.
Basic functions of the AO can be accomplished via the mini AO view
Currently loaded animation set: Referring to the image above, the currently loaded set is named TPWtest.
By clicking the small down arrow, you can easily select another set (if others are available, of course).
The wrench icon expands the mini window to full size for greater control; more about the wrench icon shortly..
The two arrows switch to the previous and next animation in the current group, respectively.
The “Sit” checkbox indicates whether the AO should override sit animations that are part of scripted furniture.
If this is enabled, the AO will try to force the use of whatever sit animation you have in the animation set; if disabled, then the animation in the furniture will be used.
Note: Animation priority will always have precedence; if the animation in the furniture has higher priority than the one in your animation set, it will be used regardless of how you have this checkbox set.
Animation priority is set at upload and cannot be changed afterward, not even by the creator – unless the creator uploads again and sets a different priority.
For greater control over the AO, click the Wrench icon; this will open the AO window to maximum size.
The Current animation set is shown in the top drop-down. Clicking the down arrow beside it allows for the selection of an alternate animation set (if you have others available, of course).
The check mark to the right of the animation set name will activate the animation set. Click this if you have picked a new one.
Default: check this if you wish to make the current animation set the default when you start Firestorm.
Override sits: Does the same thing as the Sits checkbox described above.
Be Smart: If this is enabled, the AO will try to determine whether the furniture being sat on has an animation; if it determines that it does, it will disable the sit in the AO, so the one in the furniture will be used instead.
Disable Stands in Mouselook: If this is checked, the AO will disable stand animations when mouselook is entered. This is useful for combat situations, for example.
+ Button: Click this button to manually define a new animation set.
Trash: To delete the current animation set, click this button.
Animation Group: With this drop down you can select an animation group, such as Standing, Walking, Running, etc. Having selected one, you can then change the order in which animations are played, by using ….
Up/Down Arrows: moves the currently selected animation up or down in the list, thus changing the order in which the animations are played in the animation group.
Trash: Clicking this will delete the currently selected animation from the animation group. This will NOT delete the animation itself, but just the reference to it, from the group.
Cycle: Enabling this will cause a different animation to be played, from the selected group, at each “cycle time” interval.
Randomize order: Enabling this causes the animations in the selected group to be played in random order.
Cycle time: Indicates how long an animation should play before the next one begins.
Reload: Forces the AO to reload the configuration of the current animation set.
Left/Right Arrows: Skips to the previous/next animation in the current animation group. These are the same arrows seen in the mini AO view, described previously.
Down Arrow: The arrow in the bottom right corner collapses the full AO window into the mini view, which was already described.
3)Preparing to load the AO
If you own a scripted AO, the type worn as a HUD attachment, you can get the animations and notecard to transfer to the client AO quite easily. You can use one of two methods to do so.
Method 1
Follow these steps if you are in a location where you can build; it requires the ability to rez out.
This is the method you need to use if the animations in the AO are no copy.
Rez a cube on the ground.
If you are wearing the scripted AO, detach it.
Cam in to the cube you made, then drag the AO onto it. HUDs are normally very small when rezzed in-world, and can be hard to see if you are not cammed in.
Right click the AO you rezzed out and select Open. A window opens which will list the contents of the AO; once this has fully populated, click Copy to Inventory.
This will result in the creation of a folder in your inventory, containing everything in the AO: scripts, animations and notecards.
If the AO is copyable, you can now delete it; otherwise, take it back into your inventory. Then delete the cube.
Locate the folder that was created in the step above. This folder can be dragged to another folder where it is out of the way but still available, like the Animations folder, for example.
Please do NOT put them on the Firestorm #AO folder in your inventory.
Method 2
You can follow these steps if you are unable to rez the AO out in-world, for whatever reason.
Locate the Animations folder in your inventory – it is at the top. Right Click the folder name, and select New Folder.
Type in a name for the folder – for example, give it the name of the AO you are transferring.
Make sure the AO HUD is worn; right click it and select Edit.
Click on the Content tab.
Once the AO contents are all displayed, select all items: click on the top one, then use the scroller to scroll to the bottom, press and hold Shift, and click on the last item.
Drag all the items into the folder you created in your inventory.
Close the edit window.
4) Loading the AO
There are two methods for loading the AO. You can either use a notecard that is in the ZHAO II format, or do it manually. The manual method requires no notecard, just animations.
Multiple AOs can be loaded, and you can switch from one to another simply by selecting the set within the Firestorm AO.
Using the notecard method
The notecard must be in standard ZHAO II format. Most AO creators support this format so you should not run into issues.
However, it must be noted that some major vendors have extended the ZHAO II format, and thus their AO notecard will need to be edited before it can be used in the Firestorm AO. Similarly, older AOs which use the old ZHAO format will have to be converted.
Unlike Phoenix, the animations and notecard do not need to be placed in a special predefined folder. However, they do need to be together in the same place.
Please do NOT put them on the Firestorm #AO folder in your inventory.
Once imported, the Firestorm client AO creates a new special folder: #Firestorm → #AO. This folder is protected – meaning it cannot be deleted, nor items removed from it under normal circumstances.
Therefore, avoid dragging items into it. Should you do so by mistake, please click here to see how to fix this.
Inside that are several more folders, containing links to the original animations.
So do not delete the original animations used or the AO will “break”.
As noted above, the Firestorm AO supports notecards in the standard ZHAO II format.
Notice how the animation state is in brackets, followed by each name of the animation separated with a pipe character “|”. Lines should not be longer than 255 characters.
In the sample NC, the animations in the Standing group have been broken up into several lines so they are shorter and easier to read.
It is best to delete any/all lines containing comments, before loading into the client AO. Comment lines usually start with a # character.
Locate the notecard which defines the AO that you got by one of the two methods described previously.
Open the Firestorm AO to maximum, then drag the AO notecard onto the Firestorm AO window.
The notecard is parsed and if all goes well, you have finished transferring the AO.
Select options to apply, like whether this will be the default animation set, whether to override sits, etc.
Creating an AO Manually
There is no need to have a prepared AO with a notecard to create an AO in Firestorm; you can “roll your own” if you have animations to use.
You can use the animations from a scripted AO, just use one of the above methods for getting them out of your present AO.
You should have the AO window at maximum size.
Click the + button near the top right corner to create a new animation set. You will be prompted to supply a name for it.
A new, blank animation set is created; make sure it is showing in the list of animation sets. You can now begin to fill. It starts with the Standing group selected.
In your inventory, select the animation(s) to be used as stands. Drag them from your inventory onto the AO window. (Note that it is faster to drag them all in at once rather than one by one.) The AO processes, then you can continue.
Once you have dropped all the stands in, you can switch to another animation group, like Walking. Again, select and drag the animations from your inventory onto the AO.
Repeat this for all groups for which you have animations.
Select options to apply, like whether this will be the default animation set, whether to override sits, etc.
5) AO-Related Options
There is one option related to the Firestorm AO in preferences.
Turn avatar around when walking backward: in Preferences → Move and View → Firestorm. If enabled, when you press the down arrow to walk backward, your avatar will turn to face the camera. If disabled, then your avatar will walk backward.
The Firestorm client AO information is stored in your inventory and thus usable from any computer you log in on, just like a regular HUD based AO.
We have a video of our Firestorm AO class available for you to watch anytime at:
The following Firestorm AO videos are available for you to watch.
Even though they are based on the old version we strongly suggest watching them as they do show how to load the AO.